
It is going to be almost a year I turned my private crochet hobby to a small business. I crochet to order, design and write the patterns, even making youtube videos. I learned a lot and the best thing is – I love it even more than last year.
I design and write down the patterns mainly in Czech and I know I slightly neglect my English readers and co-crocheters for what I need to deeply apologize but I am trying to work on the pattern translation as much as I could.
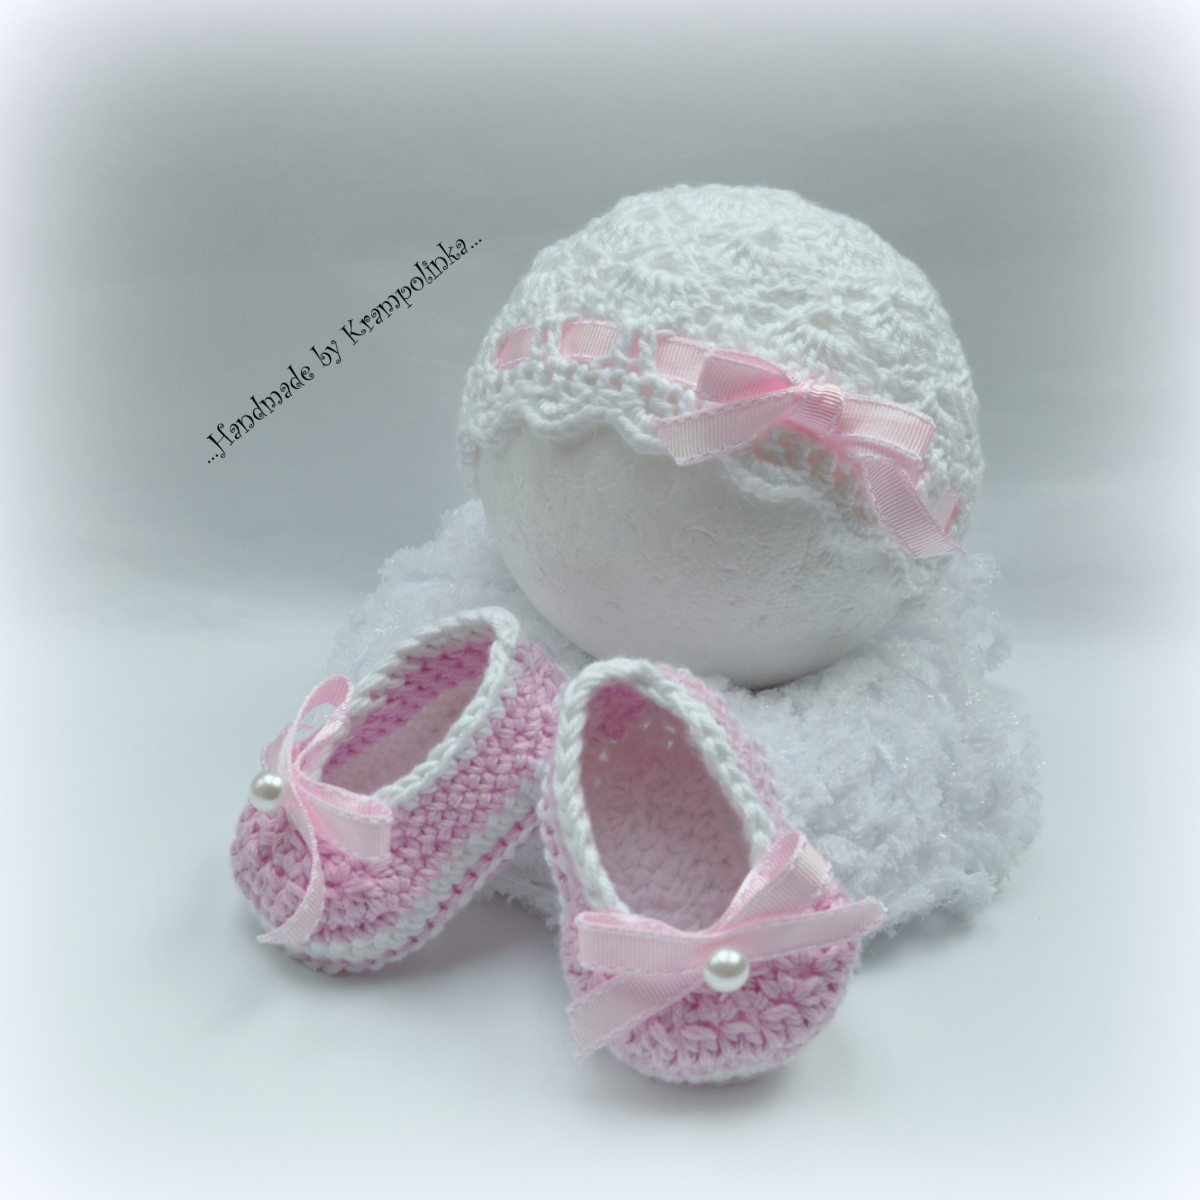
Today I would like to share my latest pattern for a simple ballerina shoes. I made a video. In Czech though. But if you do not mind turning out the sound and follow a written instruction with an occasional video peak I think you can easily manage.
I cross my fingers for you and please let me know if everything is understandable. Baby shoes, for me, were and are quite high level regarding to crocheting.
Useful tips:
- the size is for a baby from zero to two months, approximately 9 centimetres/3.5 inch of baby feet length
- to make it a little bit bigger, you need to make DC instead HDC in the first/second row
So let´s try:
Baby ballerina shoes, 9 cm/3.5 in, 0-2 months (varies according to baby size)
Yarn: Himalaya Deluxe Bamboo white (124-01) and Kartopu Bambu pink (270). Both are bamboo yarn (100% bamboo or a combination with 50% viscose), similar yarn here
Hook: 4 and 5 mm
Overseas alternatives: any yarn with this parameters – hook 3-4 mm/US 3-6, 100gr/3.53 oz. or 230m/251 yds per ball, yarn thickness 2 Fine Sport, Baby.
Ribbon and two small pearl buttons or wooden buttons
Marker or a piece of yarn
Time: 2-3 hours
Suitable for pre-intermediate
US terminology:
Sl St – slip stitch
CH – chain stitch
SC – single crochet
2SCtog – two single crochet together as one
2HDCtog – two half double crochet together as one
HDC – half double crochet
Each row starts with either 1 CH = Single Crochet or 1 loose CH = Half Double Crochet and ends with SlSt. This not apply if you use markers and crochet in circles. This pattern is written in columns that is the way the shoe is usually crocheted. Also you start with a chain and continue around this chain.
SOLE
Chain of 9
1st row:
HDC into second chain from the hook (you need to have another six free chains to follow the pattern, watch the video) (here is the heel of the shoe)
5 HDC (one HDC into one CH)
5xHDC (five HDC into the last CH, crochet back around the chain, here is the tip/front of the shoe)
5 HDC (one HDC into one CH)
3xHDC (three HDC into the chain you make the very first HDC)
SlSt (watch video where to make it)
2nd row:
one loose CH as a substitution for the first HDC, another HDC into the same place (you need to find the small gap on the right site of the substitution, make HDC here)
2xHDC (two in one HDC)
5 HDC (one HDC into one HDC)
5x2HDC (double each HDC in the tip/front of the shoe)
5 HDC (one HDC into one HDC)
2xHDC (two in one HDC)
2xHDC (two in one HDC)
2xHDC (two in one HDC)
SlSt (watch the video)
3rd row:
one loose CH as a substitution for the first HDC, another HDC into the same place (you need to find the small gap on the right site of the substitution, make HDC here)
2xHDC (two in one HDC)
2xHDC (two in one HDC)
2xHDC (two in one HDC)
5 HDC (one HDC into one HDC)
10x2HDC (double each HDC in the tip/front of the shoe)
7 HDC (one HDC into one HDC)
2xHDC (two in one HDC)
2xHDC (two in one HDC)
2xHDC (two in one HDC)
2xHDC (two in one HDC)
SlSt (watch the video)
BODY OF THE SHOE
4th row:
one chain as a substitution for the first SC
SC back loop only around the whole sole
SlSt
5th row:
one chain as a substitution for the first SC
2SCtog
2SCtog
SC around the shoe except four last CH
2SCtog
2SCtog
SlSt/or insert the marker or the piece of yarn and continue to crochet around without the substitution in the following row
6th row:
one chain as a substitution for the first SC
find the middle of the shoe – face the sole of the shoe and try to find the middle stitch, count 12 loops (the middle incl) to the right and 10 loops to the left, insert markers to the loops on the right and on the left (make it visa versa when crocheting the other shoe to mirror it, watch the video how to find the middle of the shoe)
crochet SC to the place where you inserted the marker from that place
11x2HDCtog
continue with SC
SlSt/or crochet around without the substitution in the following row
7th row:
one chain as a substitution for the first SC
crochet SC to the place where we started making 2HDCtog in the previous row, from here
6x2HDCtog (last is HDC and SC! with the second shoe it would be the first one!)
continue with SC
SlSt/or crochet around without the substitution in the following row
8th row:
one chain as a substitution for the first SC
SC around the whole shoe (in this row you can switch the colors, to make the brim in different color)
SlSt
BRIM OF THE SHOE
watch the video or turn the shoe, face the sole, take hook 5, you can see a thread from the third row, insert the hook and make SlSt, go around the whole sole with SlSt, ideally with a contrasting color.
Finishing
I usually sew the yarn in the shoe without making knots. Make a bow and decorate the shoe. Do not sew it to the tip of the shoe but close to the baby instep to make the “hole” smaller to prevent the shoe to go easily from the baby foot. You can also make a stripe either across the instep or around the ankle.
Congratulation. That it is. Just to make a second one.
If you like it, please share this pattern on social networks as a “thank you” to help me to run this website. You can also subscribe to my youtube channel.
If you have any questions please leave me a message, send me an e-mail or you can contact me on my FB page Krampolinka.
You can also subscribe to this website in order not to miss any new free pattern.
Thank you very much for your visit.
Katy
VIDEO HERE
PICTURES


No Comments